Selection and Masking
Quick and Easy Area Selection
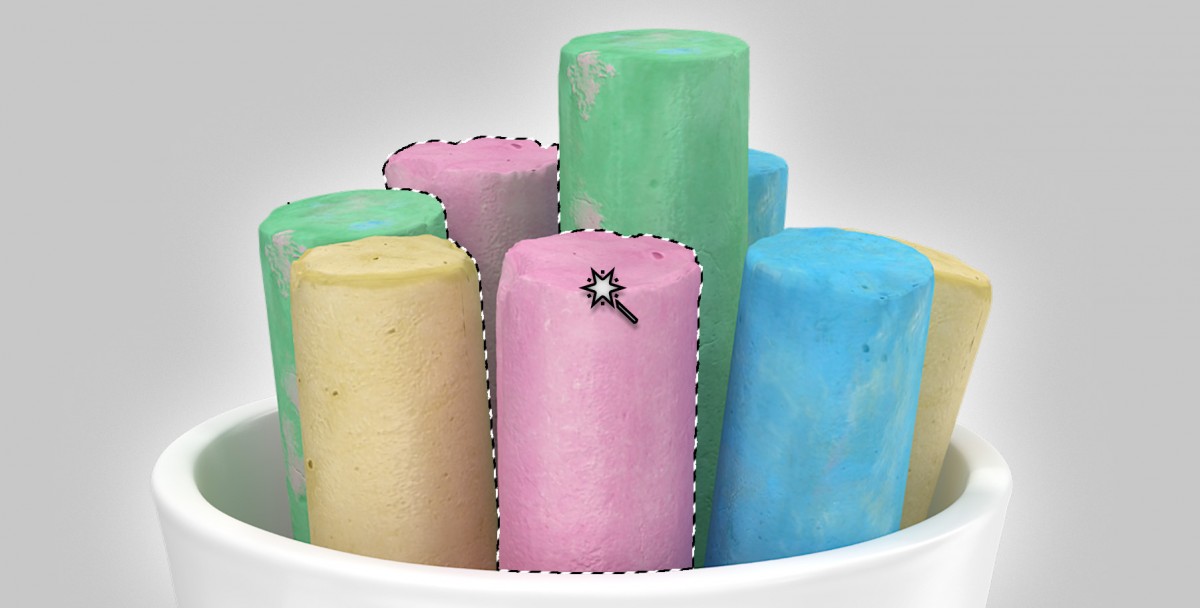
Masking and selection are amongst the most common – and most tedious – tasks that designers perform when compositing imagery. To minimize that pain, and add precious time to the production clock, all PixelSquid PSD files include Selection Areas – special layers that let you make quick and accurate selections with a simple click.
How it Works
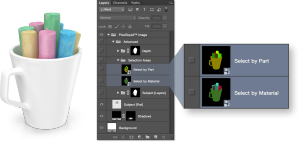
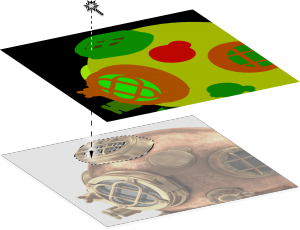
PixelSquid PSD files include two special Selection Layers – Select by Part, and Select by Material. Each of these layers contains a patchwork of solid colors, each unique color corresponding to a specific area of the image. Used in conjunction with the Photoshop Magic Wand Tool, these layers make masking and selection a breeze.
Select by Part
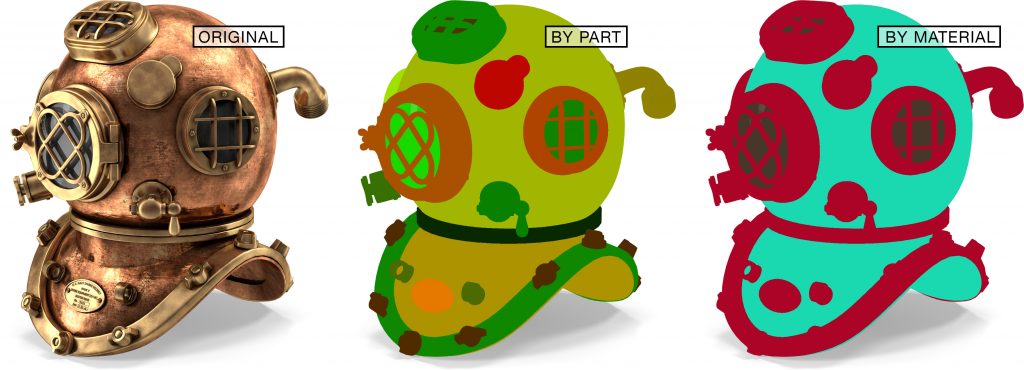
This Layer associates a unique color to every individual bit of the physical items that comprise the scene. Generally if it’s something you could separate from the object or scene, it will be selectable with the Magic Wand Tool using this layer.
Select by Material
This layer assigns unique colors to specific materials in the image. For example, you may want to simply pick “all the brass”, or “just the copper” in an image. You can then make universal changes to a given material without needing to find and hand select every instance.
Tips and Tricks
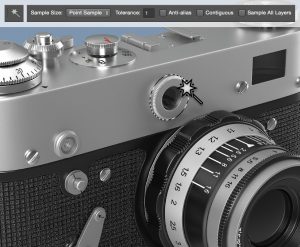
Magic Wand Tool Settings
When selecting with Photoshop’s Magic Wand Tool, use these settings for best results:
Sample Size: Point Sample
Tolerance: Usually 1, though in some cases scaling and rotation may introduce a small amount of noise to the Select by layers, in which case you may want to increase this a little to get a clean selection.
Anti-alias: NO
Contiguous: Depends on your needs at the time
Sample All Layers: Always OFF
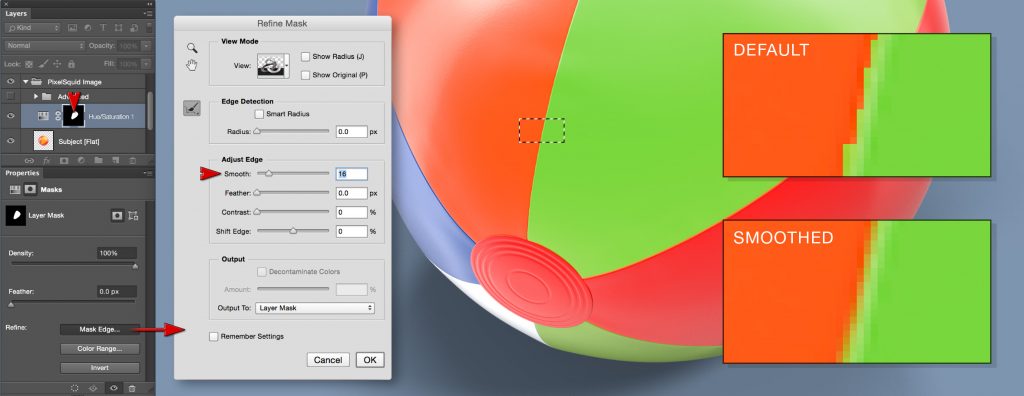
Anti-alias Your Selections
PixelSquid Area Selection are created with no anti-aliasing so that you can perfectly combine selections of adjacent areas by shift-clicking with the Magic Wand tool. Using these selections is usually fine, with no aliasing visible, but if you do wish to have anti-aliased selections, simply use Photoshop’s mask refinement tools to smooth layer masks as needed.
- Select the layer mask you wish to smooth from the Layers palette
- Click the Mask Edge button
- Adjust the Smooth slider. Values from 4 to 16 are usually sufficient.