Using the PixelSquid PSD
PixelSquid PSD Color Depth
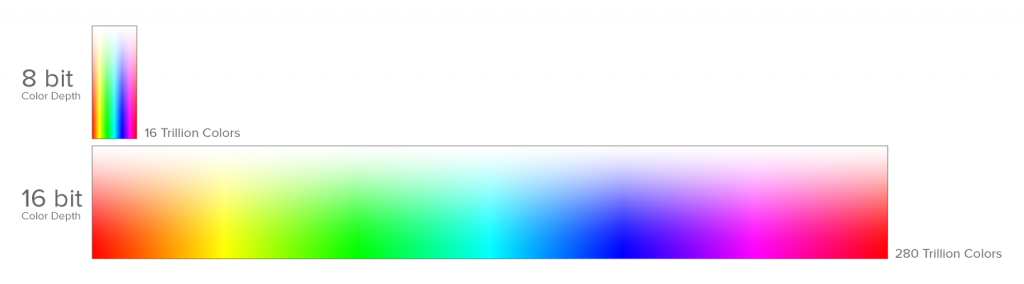
To get the most out of the PSD features, PixelSquid PSDs have been compiled as 16 bit color depth files. Working at a 16 bit color depth has become quite common and allows for far more accurate color and exposure, as well as smoother color gradients and more details in shadows and highlights.
If the composition you’re working in is at a lower 8 bit color setting, embed the Pixel Photoshop layers as a Smart Object. This will allow you to work in your 8 bit main composition while manipulating the 16 bit object composition separately. Once you’re happy with the look of your PixelSquid object in your main composition, you can either keep the layer as an editable Smart Object, or Rasterize the layer, which will convert it to 8 bit and flatten the layers into a single layer in your main composition.
PixelSquid PSD Layers
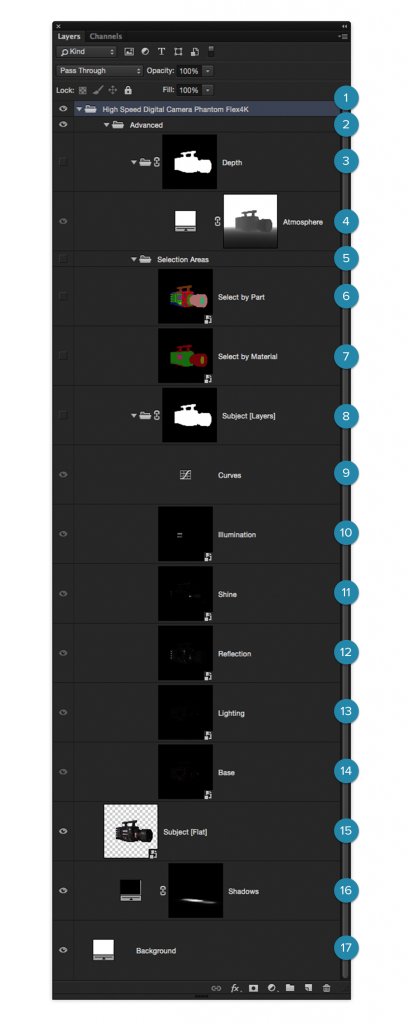
- Top Group – This group allows you to translate and rotate the all associated layers of the object.
- Advanced Group – This group contains all the most powerful layers of the PixelSquid PSD.
- Depth Group (mask) – This group contains a mask which isolated only the object and not the shadow or background.
- Atmosphere – This layer can be used to create fog and dust effects. Change to color to match your environment and use opacity to control the intensity of the effect. You can also use a Levels adjustment to manipulate the distance of the effect.
- Selection Areas – This group contains two layers for controlling different parts of the object.
- Select by Part – This layer can be used to color select specific parts of the object.
- Select by Material – This layer can be used to color select the individual materials of the object.
- Subject Layers (mask) – This group contains all the lighting components of the objects. It uses a mask to isolate the object from the shadow and background.
- Curves – Leave this layer as is. It is used to control the output of the four lower layers.
- Illumination – This layer is not always available. It is only found on objects that are emitting light; such as LEDs on an electronic device, or screens on a laptop.
- Shine – This layer controls the specular highlight of the object. These are bright highlights from the lights in the 3D scene that rendered the object.
- Reflection – This layer controls the reflections of the object. Reflection consist of information from the environment, as well as the object itself. Usually, when making color changes to an object, you would want to do it below this layer so that reflections and highlights remain unaffected.
- Lighting – This layer contains the shadows and lighting information of the object. You can manipulate the opacity of this layer to reduce the overall lighting of the object. Some very creative things can be done with this layer, experiment to see what you can do.
- Base – This layer contains the base illumination of the object. This can be a sensitive layer to manipulate since it contains the essence of the object, so be careful when manipulating it.
- Subject [Flat] – This layer is used when the Advanced layers are not needed. However, you can do some interesting and creative things with the Advanced layers while still using this layer as a base. A good example, would be amplifying reflections and highlight by only turning on those layers in the Advanced layers and keeping this layer visible.
- Shadows – Use this layer to control the intensity, color and placement of the object’s shadow.
- Background – Use this layer to control the color of the background. Turn it off unneeded.
PixelSquid PSD Channels
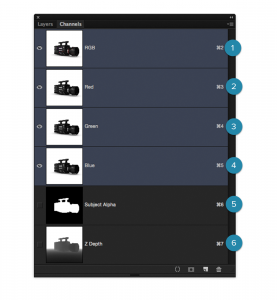
- RGB – Standard Main RGB Channel
- Red – Standard Red Channel
- Green – Standard Green Channel
- Blue – Standard Blue Channel
- Subject Alpha – Greyscale channel of object alpha. This channel can be used to select and isolate the object without a shadow.
- X Depth – Greyscale channel for object depth. This channel can be used for depth-of-field effects.